Upgrading RAM Of My Old Asus S551L Laptop
Hello fellas,
Recently I took up a course on cyber security where I found out that, I need to spin up many Virtual machines simultaneously, to practice reconnaissance and penetration testing on different Operating systems. But my Asus Laptop with 4 Gigs of RAM and a slow-running HDD was just not put up for that purpose. So instead of spending 50K on a new laptop, I decided to upgrade my Laptop’s RAM from 4 Gigs to 12 Gigs and my HDD to a high-performance SSD. However, in this article I am demonstrating, just the RAM Upgrade. The SSD upgrade video is underway since the parts needed for SSD upgrade are not yet delivered. Trust me, the results are just awesome.
Without wasting more time, let’s dive into the process of upgrading the RAM for my 7-year-old Asus S551L laptop. My Asus laptop has an inbuilt 4 GB RAM which can not be removed gracefully nor changed. The good news is there is an additional RAM slot that has been provided by the manufacturer to play with more RAM capacity. This slot supports a maximum of 8 Gigs of RAM. So, in total, you will be getting 4+8 = 12 Gigs of RAM once the upgrade is done. The process is very simple and doesn’t require any additional software or system backup.
Tools Needed:
1) Phillips head magnetic screwdriver ( buy a set if you don’t have one already, I don’t know the size which I used) – INR 700
2) Antistatic Fiber Pry set (to open the pack panel of the laptop) – Included in the above set
Parts Needed:
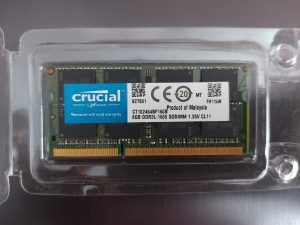
1) Crucial CT8G3S160BMCEU 8GB 1600MHz DDR3L 204-Pin Mac Memory – INR 2350
Note: before we begin, make sure you don’t have static electricity on you. Static electricity can damage the electronics when touched. I recommend using an Anti-Static Electricity Grounding Wristband with Cord Ground Cable and Gloves. – INR 500 Maximum.
Total Cost of the Upgrade is INR 3550 and 30 minutes of your precious time. This is insanely low when compared to buying a new laptop with same configuration.
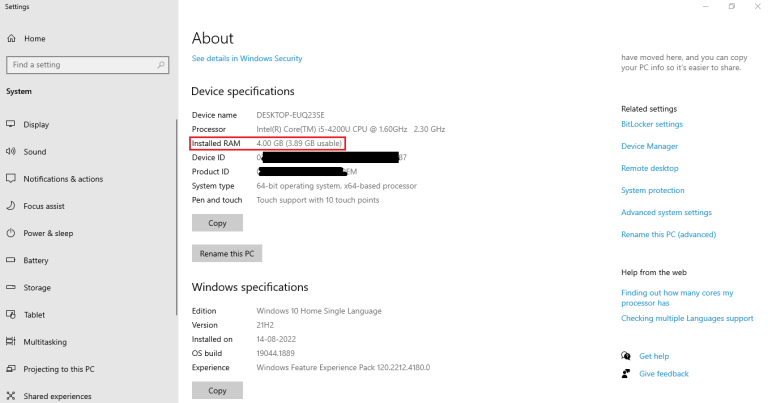
Here is the screenshot of my system information before the upgrade.
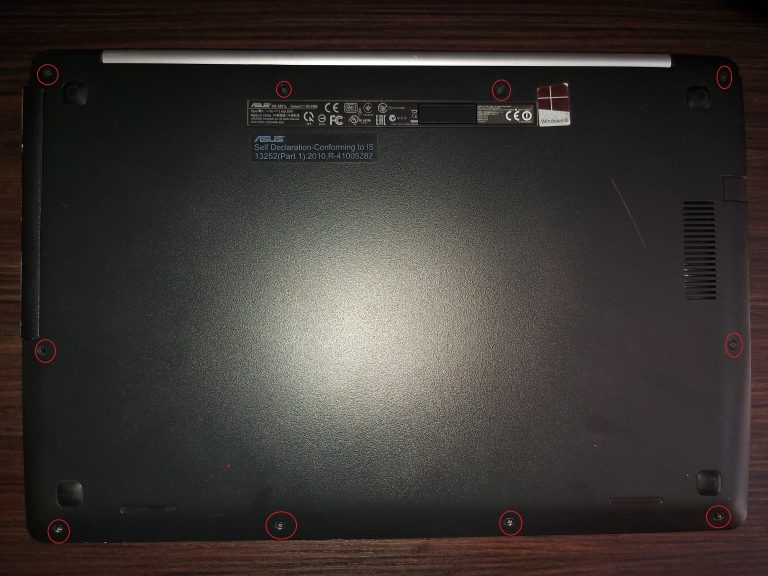
STEP 1: Lay down the laptop upside down on a clean smooth surface and use the screw driver to remove the screws. Care must be taken, not to apply too much of pressure while removing the screws, this may break the back panel and damage the internal delicate electronics.
STEP 2: Remove the back panel carefully through the edges from one side, using the pry tool. This will expose the internal electronics and the motherboard. Locate the RAM socket housing.
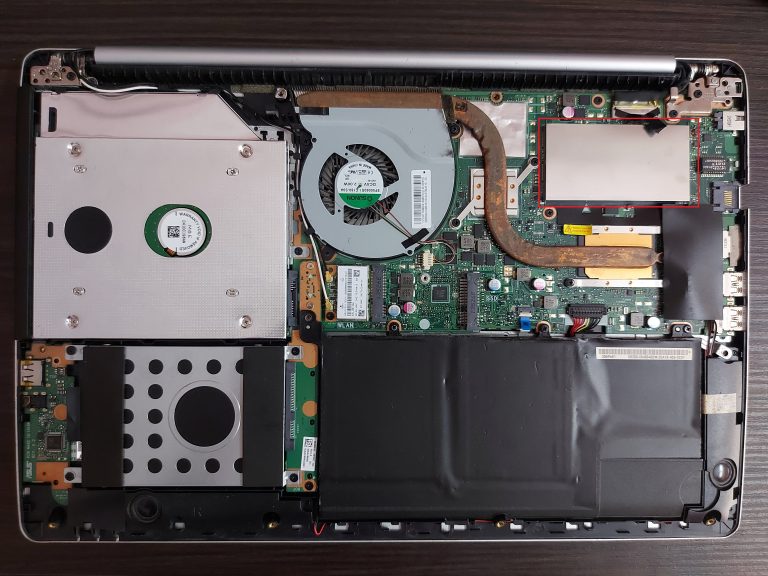
STEP 3: The housing doesn’t need any tool to open, gentle lifting using your fingers will open the housing. Inside, you can see the embedded 4 GB RAM module which can not be removed. Above the 4 GB RAM module, you can find the header to insert our new 8 GB RAM card.
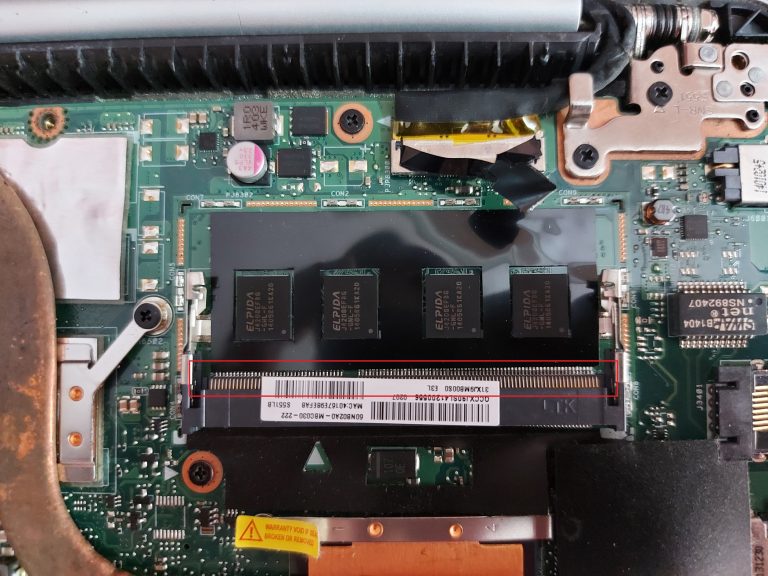
STEP 4: Remove the new 8GB RAM card from the packaging and insert it in to the header. make sure the small gap between the pins coincides with the gap in the header. after inserting half way, gently push the RAM card downwards (press it towards the motherboard), the two locks on either sides of the header will lock the card firmly.
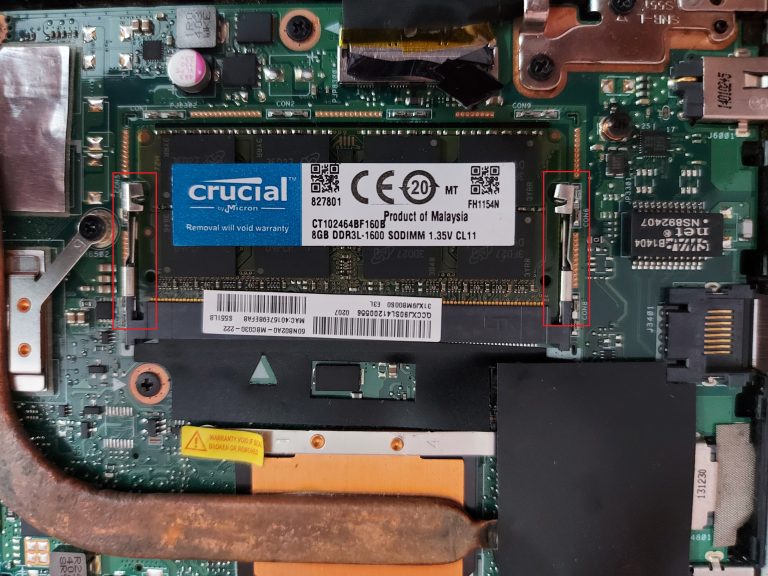
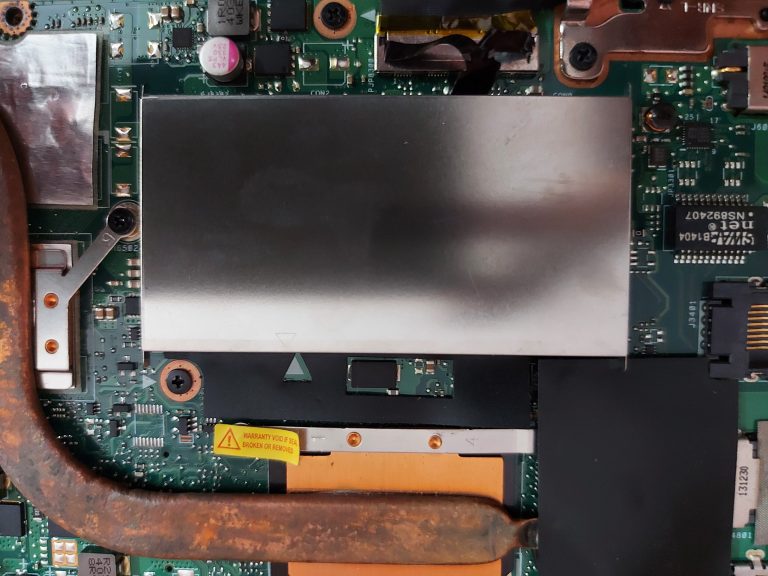
STEP 5: Put back the RAM housing cover and then the laptop back panel, fasten the screws. You may also chose the verify the installation before putting the screws back in.
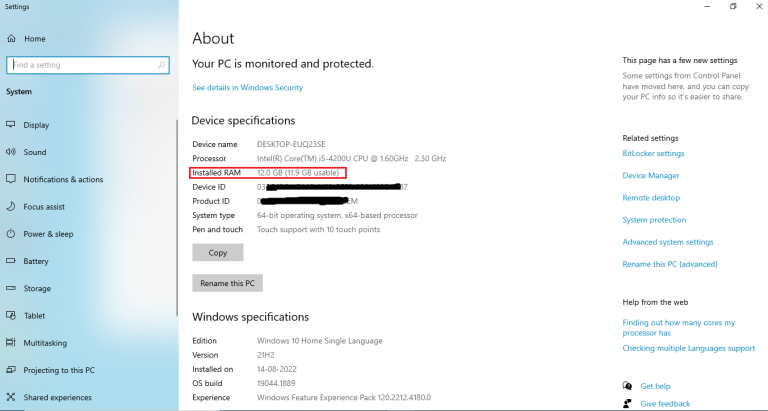
STEP 6: All set ! turn on the laptop and open the system information page. you can see 12 GB RAM available for usage.
Lastly, please be aware that I am not supporting or advertising any brand or parts which I have used in this article. The procedure described above is for information purpose only and if you intend to, or attempting this procedure, please refer the manufacturers manual for detailed information and use this information at your own risk.
Please feel free to comment and discuss to come up with more effective way of doing this.
NOTE: DO NOT ATTEMPT THIS PROCEDURE, IF YOUR LAPTOP IS WITHIN WARRANTY PERIOD. PERFORMING UNAUTHORIZED RAM UPGRADE MAY VOID YOUR WARRANTY.
Thank you and visit again for more awesome tutorials.